Make Your Own Japanese Fruit Sandwiches
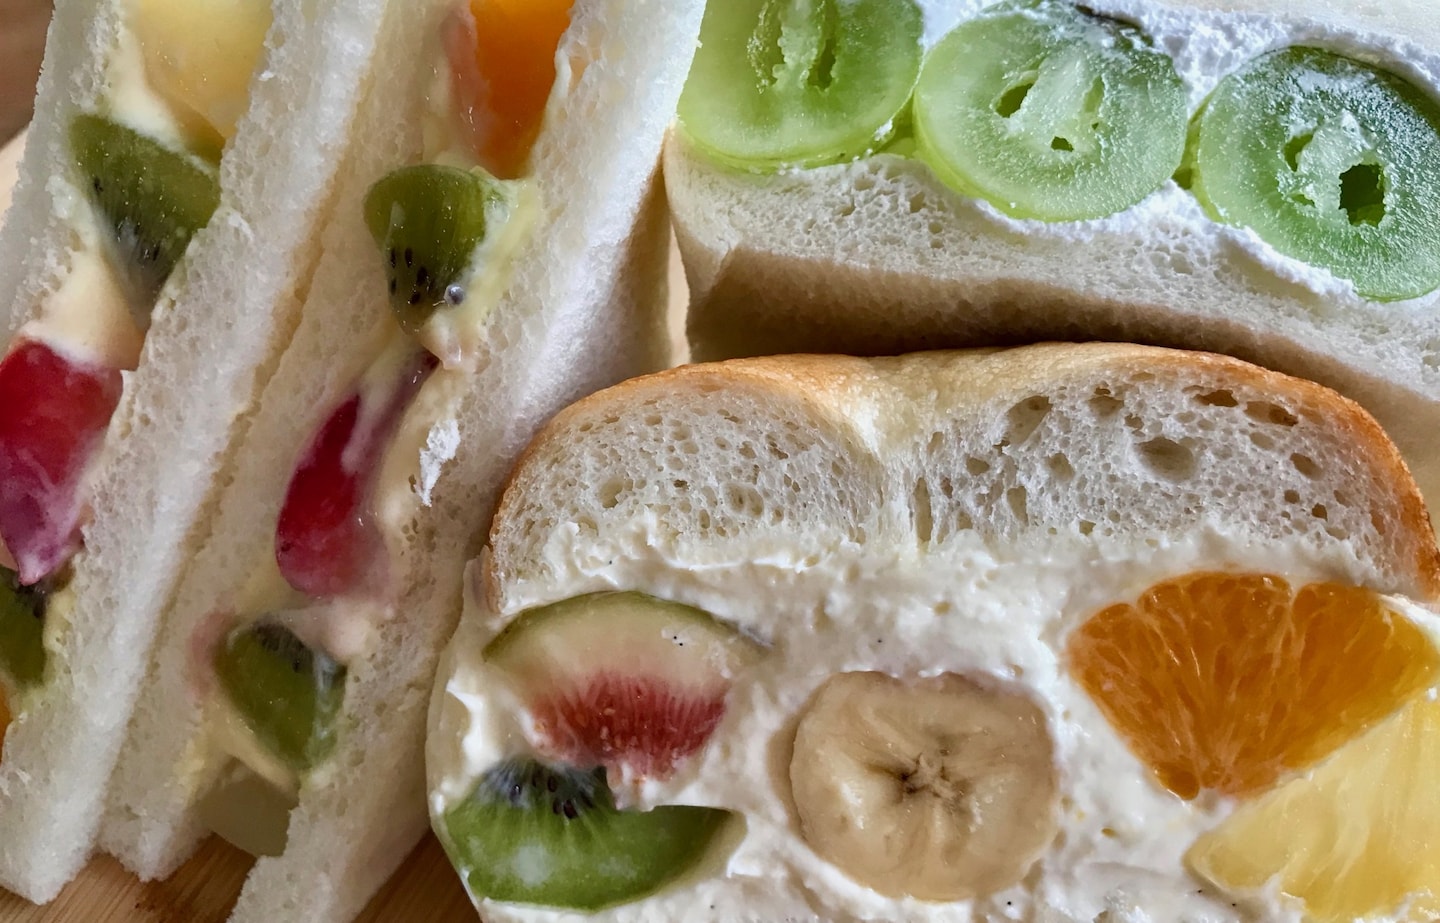
It can be a bit of a head-scratcher the first time you see it: Cut fruit nestled in cream and sandwiched between two pieces of plain white bread. Fruit . . . sandwiches? Indeed! And they sit by the dozen, fluffy and filled to bursting, in display cases at fancy fruit boutiques and cafes. You’ll even find them on convenience store shelves.
By Helen Alma LangfordAround for a century, possibly longer, fruit sandwiches have a murky past that may trace to Kyoto. But then again, maybe not—a 2019 article in the Nikkei attempted to clear things up, but to no avail.
What is clear is that fruit sandwiches—furutsu sando in Japanese—retain both their wow factor and popularity despite having become commonplace. They’ve even become an outlet for artistry, with some kitchen creatives turning fruit sandwiches into flowery masterpieces.
Sandwich-as-canvas takes some practice, but a home-made version is within reach for most folks. We know because we tried—and several delicious disasters and scrumptious success stories later, we’re bringing you the basics.
Let Them Eat Cake . . . Made with Bread
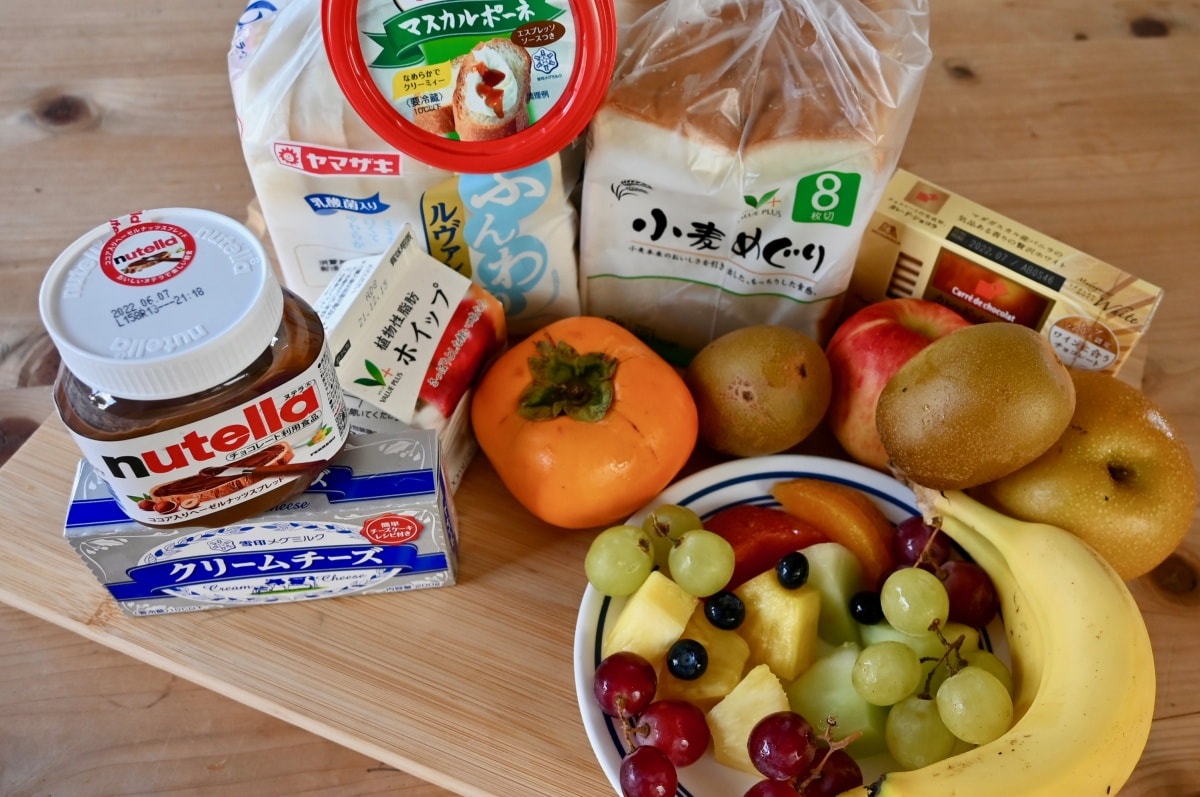
Ingredients, both required and optional. Seasonal fruit gives the best flavor, while supermarket cut fruit provides good variety.
The sandwiches are a little like cakes, and as skinny cake layers can’t stand up to ample layers of icing, so skinny slices of bread can’t handle generously spread cream weighed down with fruit.
The lesson: go thick. If you’re in Japan, this means choosing bread of at least 8 slices per package (approximately 15 mm in width). We found the 6-slice-per-package (20 mm) bread held up better with heavier fruit. If you’re planning on using thinly sliced fruit and minimal cream, by all means, give thinner-sliced bread a try.
When it comes to crusts, unless you’re using a very soft bread, cut them off. And if authenticity is your goal, head to your nearest Asian food market and ask for Japanese shokupan, which has a taste and texture that’s different from other supermarket sandwich breads.
Whip It Good
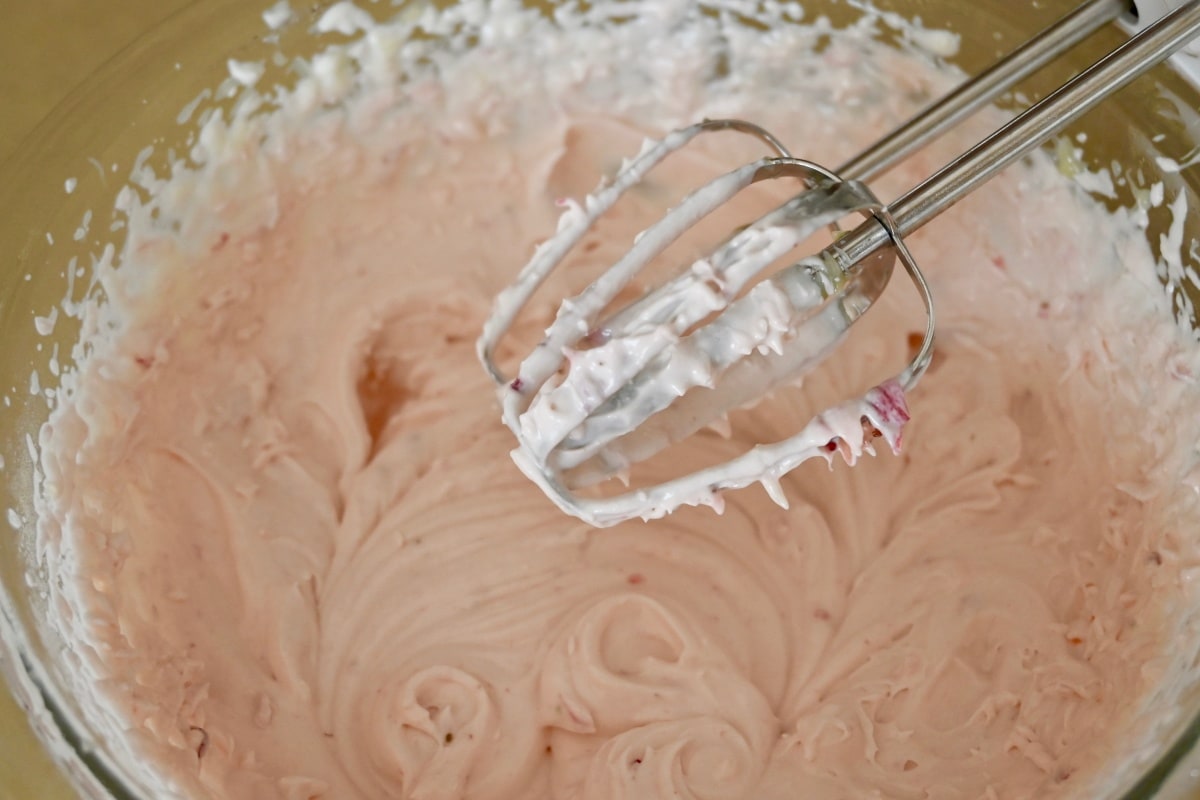
Adding citrus zest, extracts, and fruit adds interest to your whipped cream. Just be careful to keep it firm but not heavy.
Whipped cream makes or breaks a furutsu sando. It should be thick, but not too heavy. Plenty of folks whip up plain whipping cream and sugar, but stabilizing your cream filling will keep things firmer, longer. Cream-cheese or mascarpone whipped cream and whipped white chocolate ganache (surprisingly easy) are good options. Recipes can be found online.
Fruit Salad Sandwich
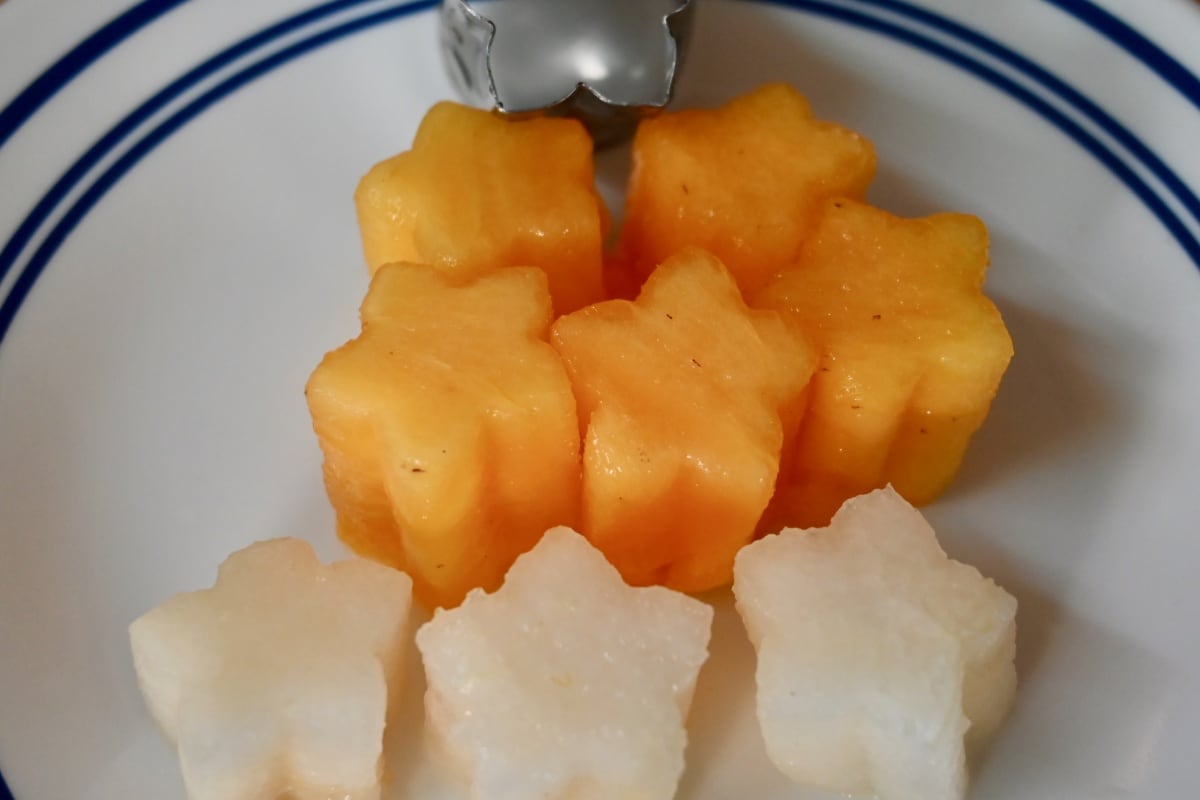
Cookie cutters are an easy way to fancify your fruit sando.
By far the most famous is the ichigo-sando, or strawberry sandwich. But kiwi, mango, banana, mandarin oranges, and grapes are also popular fillers—and often mixed together. Pretty much anything goes, as long as the fruit isn’t too juicy or too hard.
How you prep your fruit is up to you. Just keep in mind that you want to keep things even, so visualize your sandwich cut line, whether on the diagonal or otherwise, and arrange your fruit—sliced or whole—accordingly. Pay special attention to the fruit that sits across the cut line: this is what will make your sandwich beautiful.
Putting It All Together
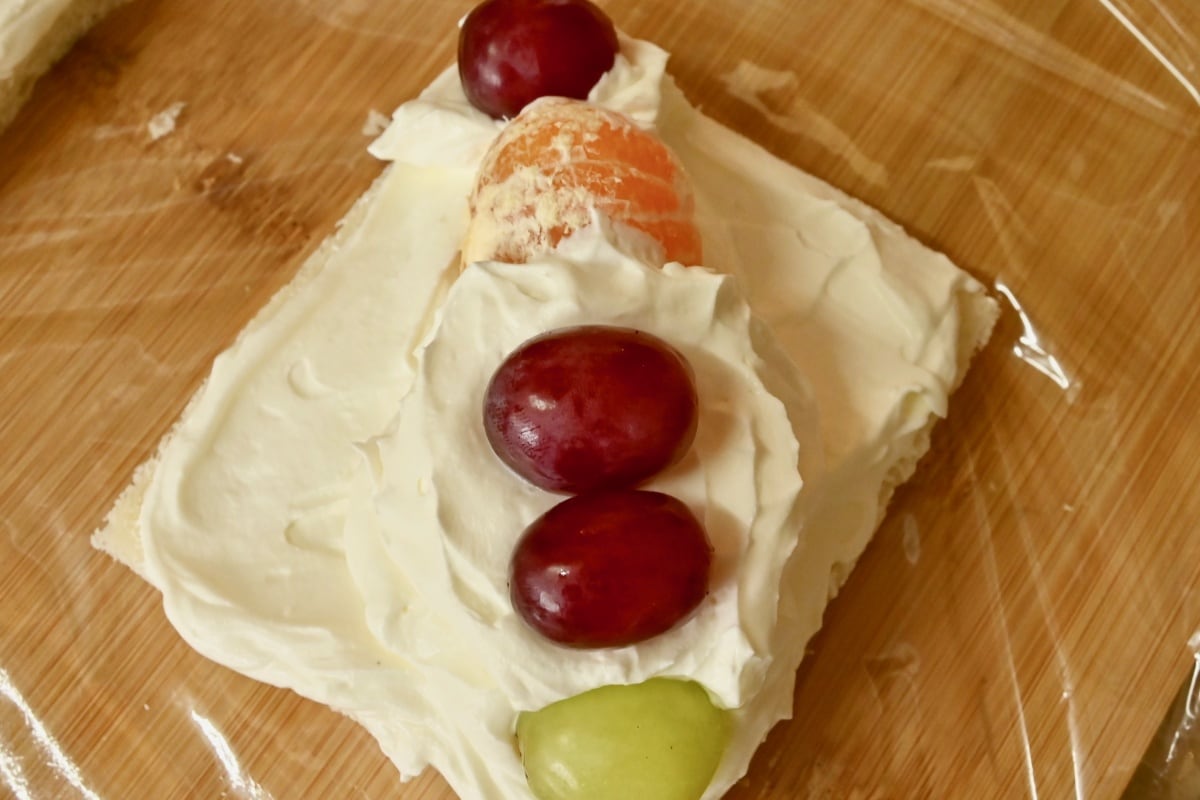
Visualize your cut line (which runs top to bottom for this sando) as you place your fruit.
Before you begin, make sure you have the following on hand:
Ingredients
• Sliced bread
• Prepared fruit
• Well-chilled whipped cream
• Any extras (jam, Nutella, sprinkles, etc.)
Equipment
• Cutting board (your workstation)
• Plastic wrap (to facilitate sandwich cutting—we tried to go eco and skip this step. The results were messy.)
• Spatula (for spreading whipped cream)
• Sharp knives (for cutting fruit and the sandwich)
• Marker (for indicating cut line)
• Cloths or towels (in case of whipped-cream disaster)
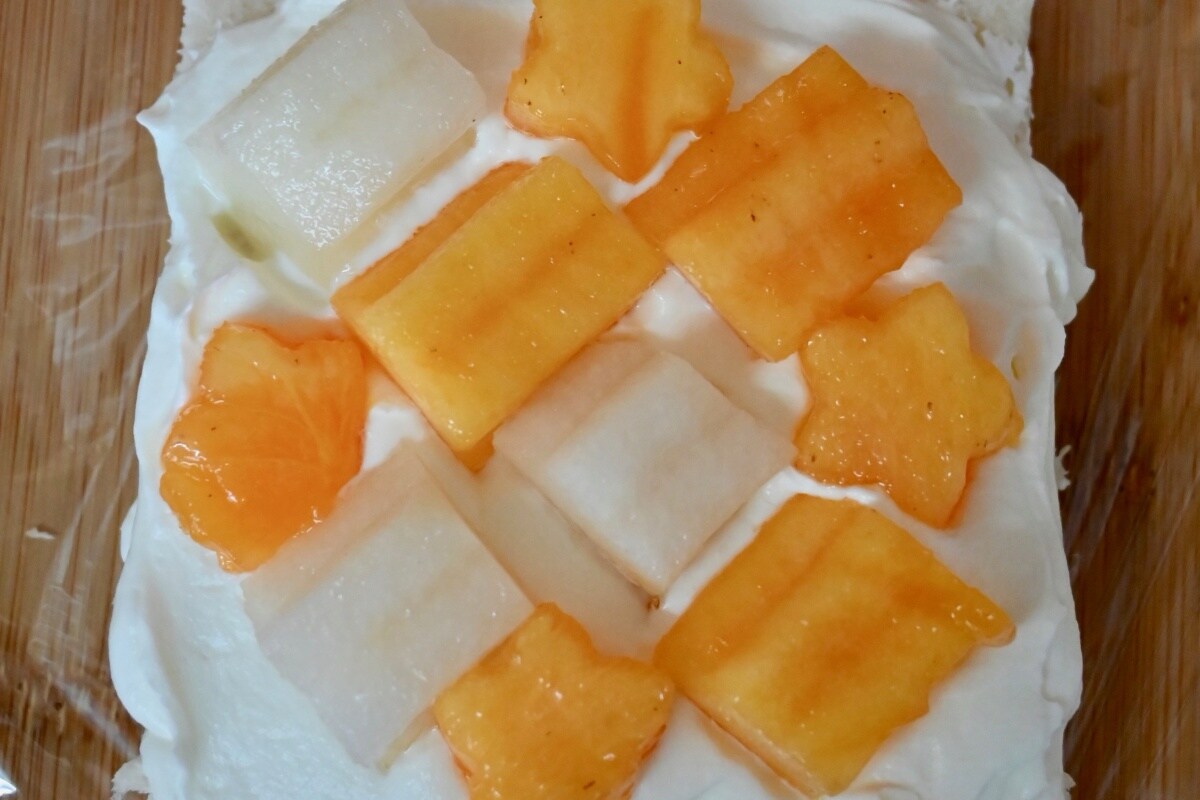
Once you have your cut line decided (top left to bottom right here), fill in the rest of your bread with fruit.
Step 1: Roll out a piece of plastic wrap.
Make it big enough to wrap around your sandwich and lay it down on your cutting board. Construct your sandwich on top of the wrap.
Step 2: Spread the whipped cream on the bread. (If you’re using Nutella, jam, etc., do that first.)
Cover one entire surface of each slice, adjusting the thickness of the cream to your fruit. If you’re popping a whole kiwi or mandarin orange across your cut line, you’ll need more whipped cream than if you’re using whole strawberries or sliced fruit.
Step 3: Arrange the fruit.
Think this through carefully, especially if you’re aiming for art, as you might have to layer whipped cream and prepped fruit to get the desired results. If you’re just looking for a pretty sandwich, no pattern required, then just make sure your nicest pieces of fruit sit across the cut line so each half of the sandwich is equally gorgeous.
Step 4: Even things out.
Fill in any cream-free pockets or uneven spots around fruit.
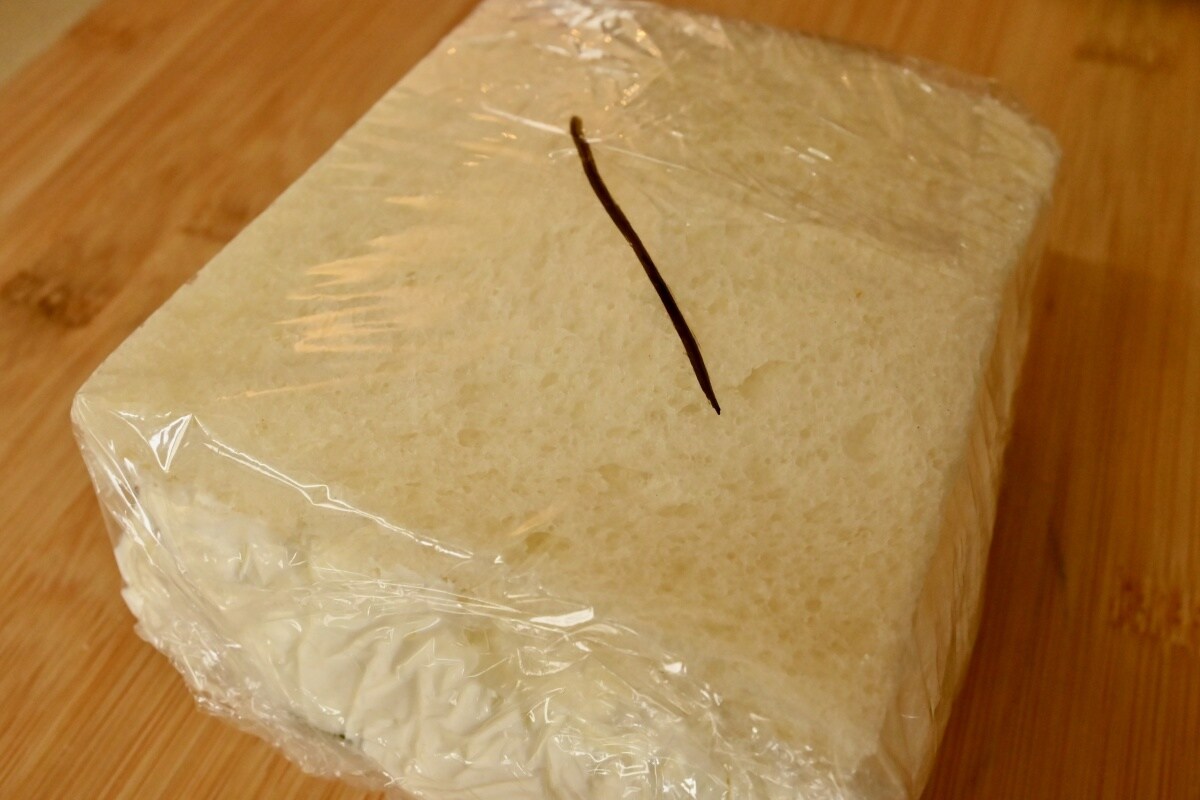
Cut your sando wrong, and it’s game over, so don’t forget to mark your sando.
Step 5: It’s sandwich time.
Pop on the top slice of bread and press down ever so slightly. Tidy up the edges and then wrap the plastic wrap up and around the sandwich so it’s firmly held together without squishing out the filling. Using the marker, draw your cut line across the plastic wrap.
Step 6: Chill.
Cut your sando wrong, and it’s game over, so don’t forget to mark your sando.
As you’ve been working, your whipped cream has been warming up and softening. Firm it up in the fridge for at least 30 minutes.
Step 7: Cut sandwich, reveal genius.
Grab a knife—preferably a long, sharp one—and gently cut through the plastic wrap and your sandwich along the cut line. Carefully remove the two halves from the wrap and pop them on a plate.
Voila!
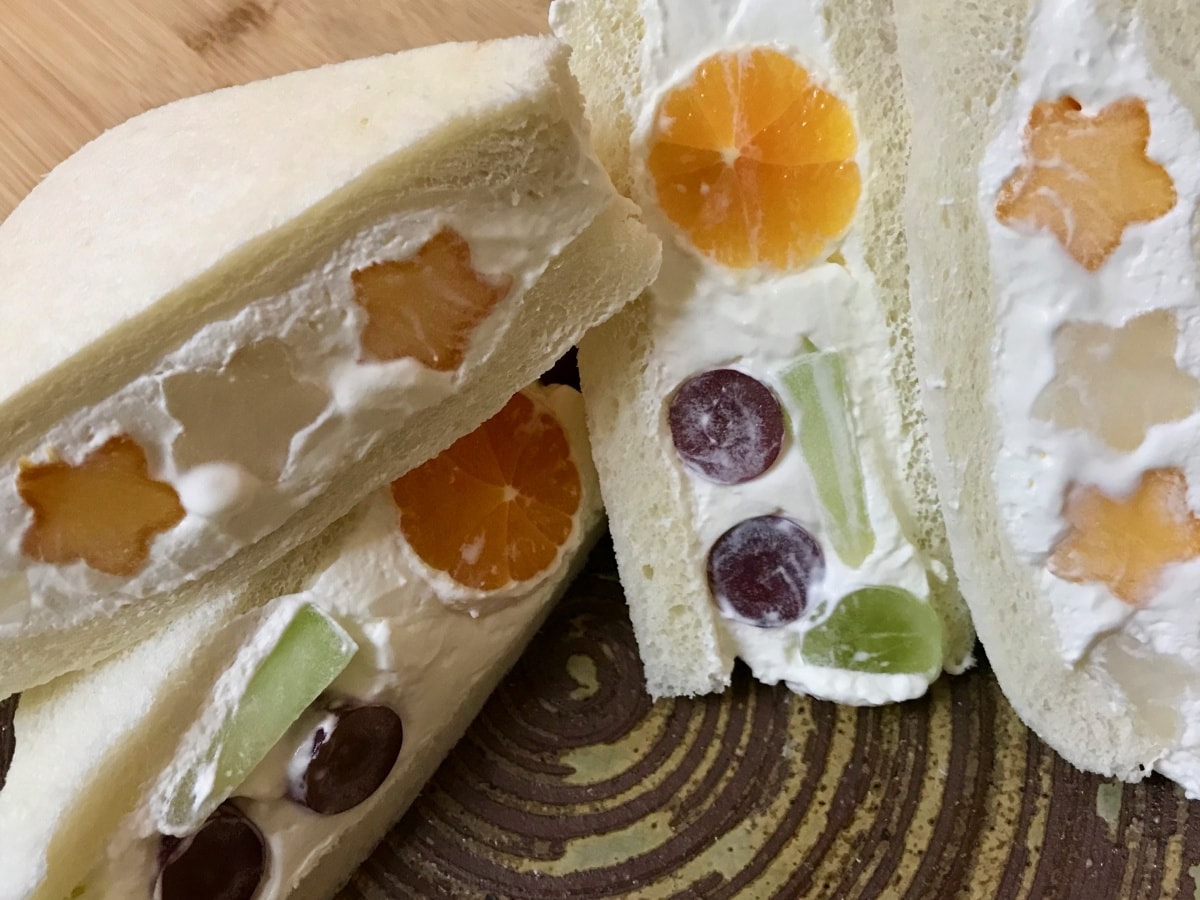
The flower may not have worked as planned, but we’ll enjoy a gloat about the persimmon and nashi stars.
Step 8: Eat.
You did it! Now you can work your way up to flowers and animals, or go low-key with an open-faced fruit sando. Artistry awaits.


