

How to Use a Loppi Ticket Machine
Lawson first introduced Lawson Ticket sales in 1996, with Loppi multimedia terminals introduced to all stores two years later. Loppi terminals are a convenient way to get concert tickets, theater tickets and even tickets to Universal Studios Japan, Tokyo Disneyland and Disney Sea—and they're the only way to get tickets to the Ghibli Museum!
By Lawson Station
You can also use Loppi machines to for sports tickets, online shopping and a number of other services, such as advanced purchase of DVDs and gift items, and applications for certification tests.
Below, we'll outline some of the most common tickets you can get on the machine—including how to get them even if you don't read Japanese!
Ghibli, Doraemon & USJ Tickets
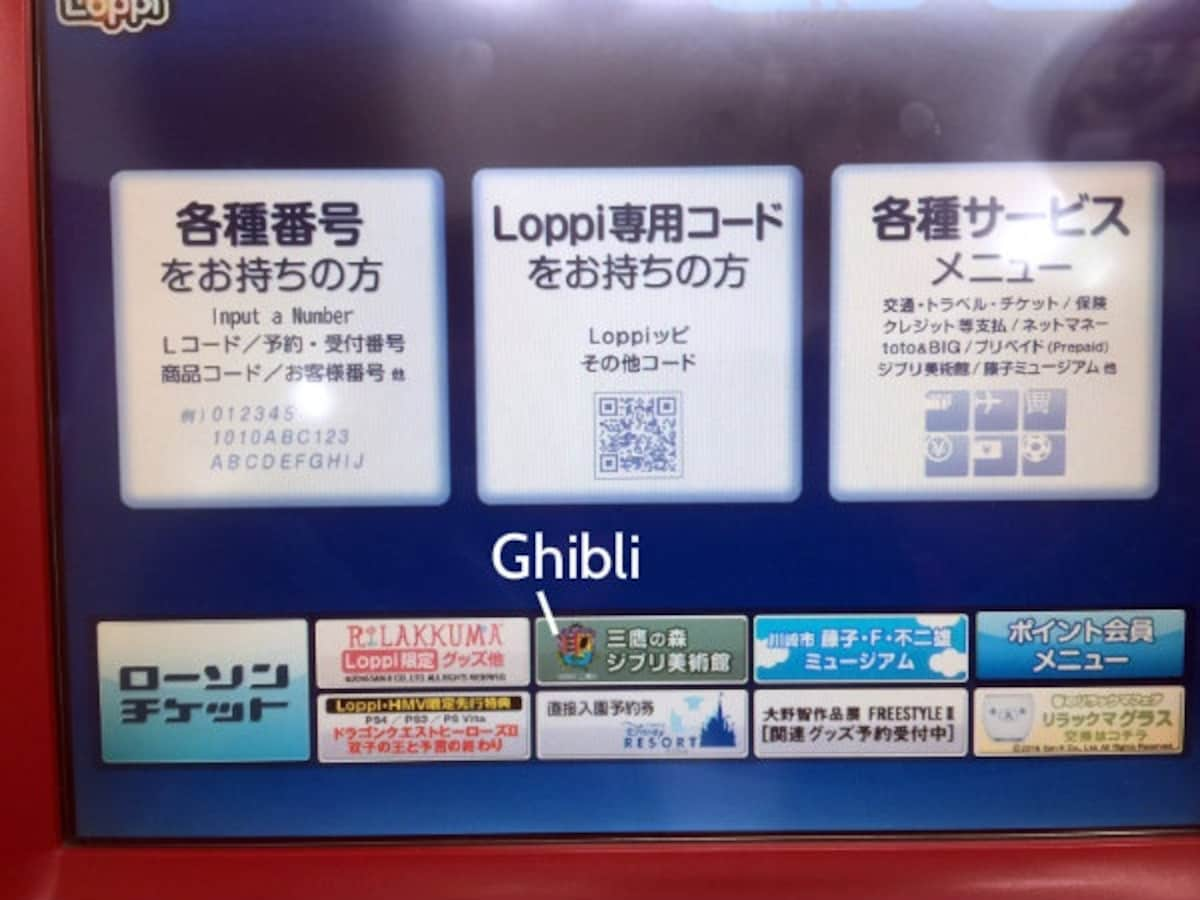
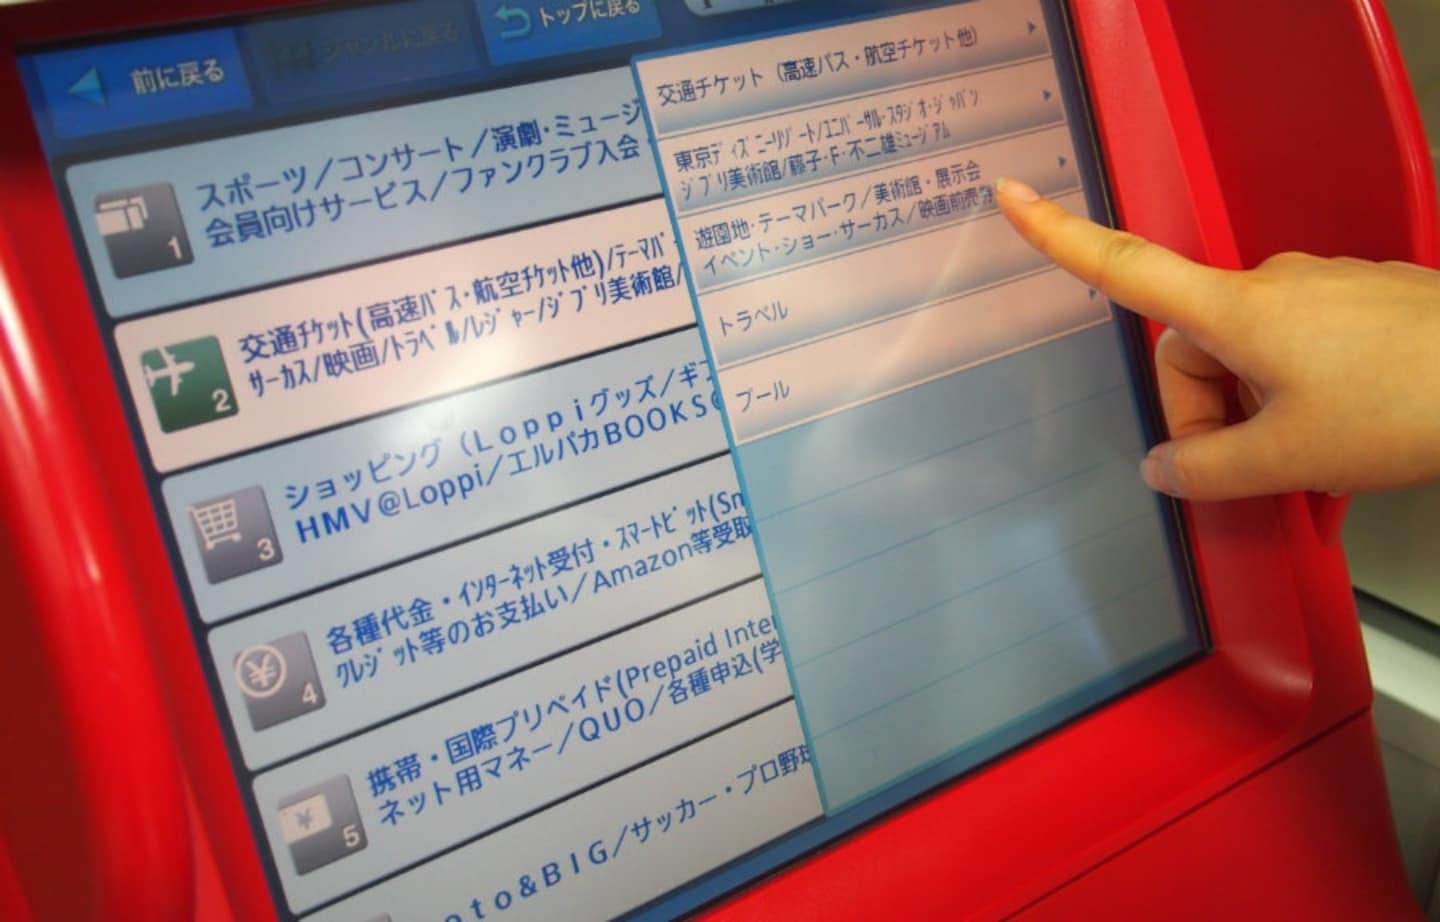
Don't be intimidated by the Japanese on the starting screen. If you're looking for Ghibli Museum tickets, just hit the green button in the middle of the bottom row and follow the instructions here.
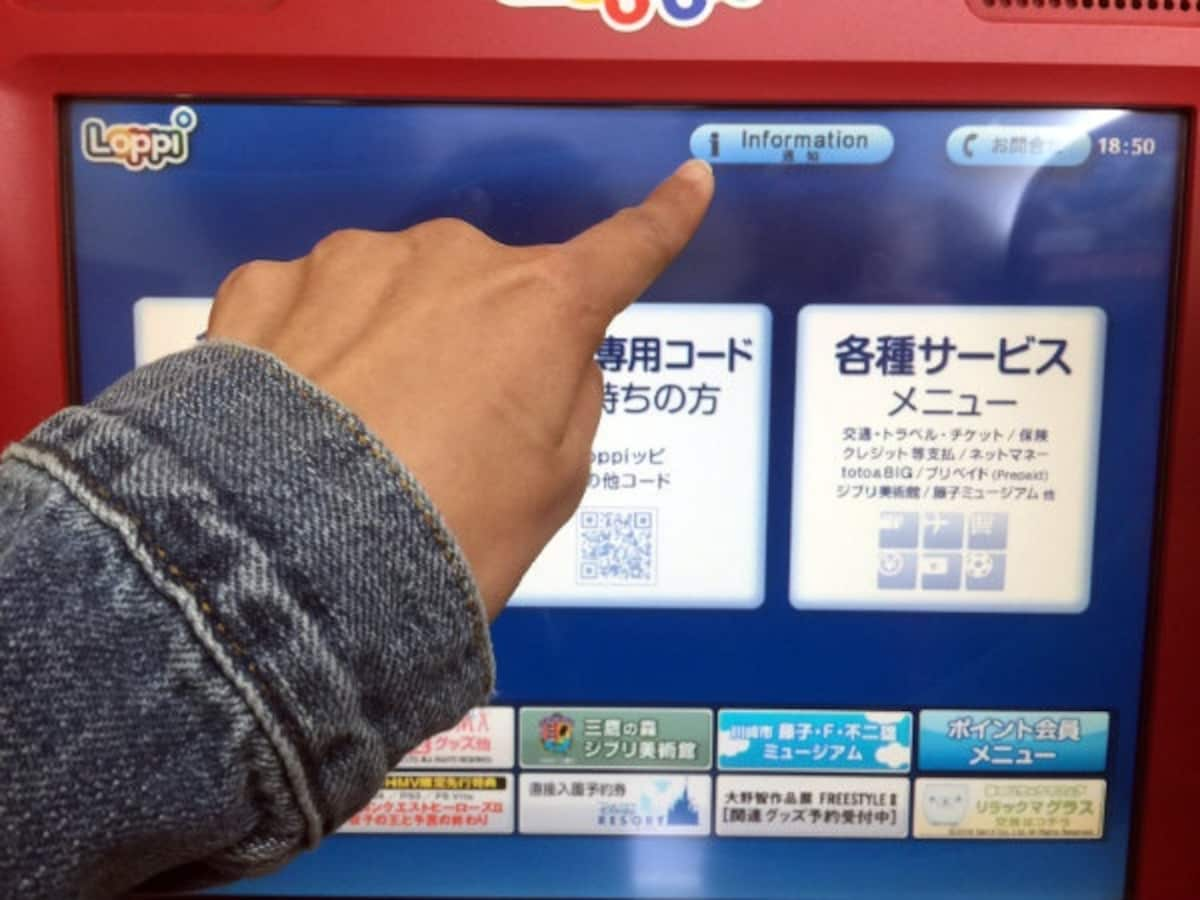
You can also hit the Information button at the top...
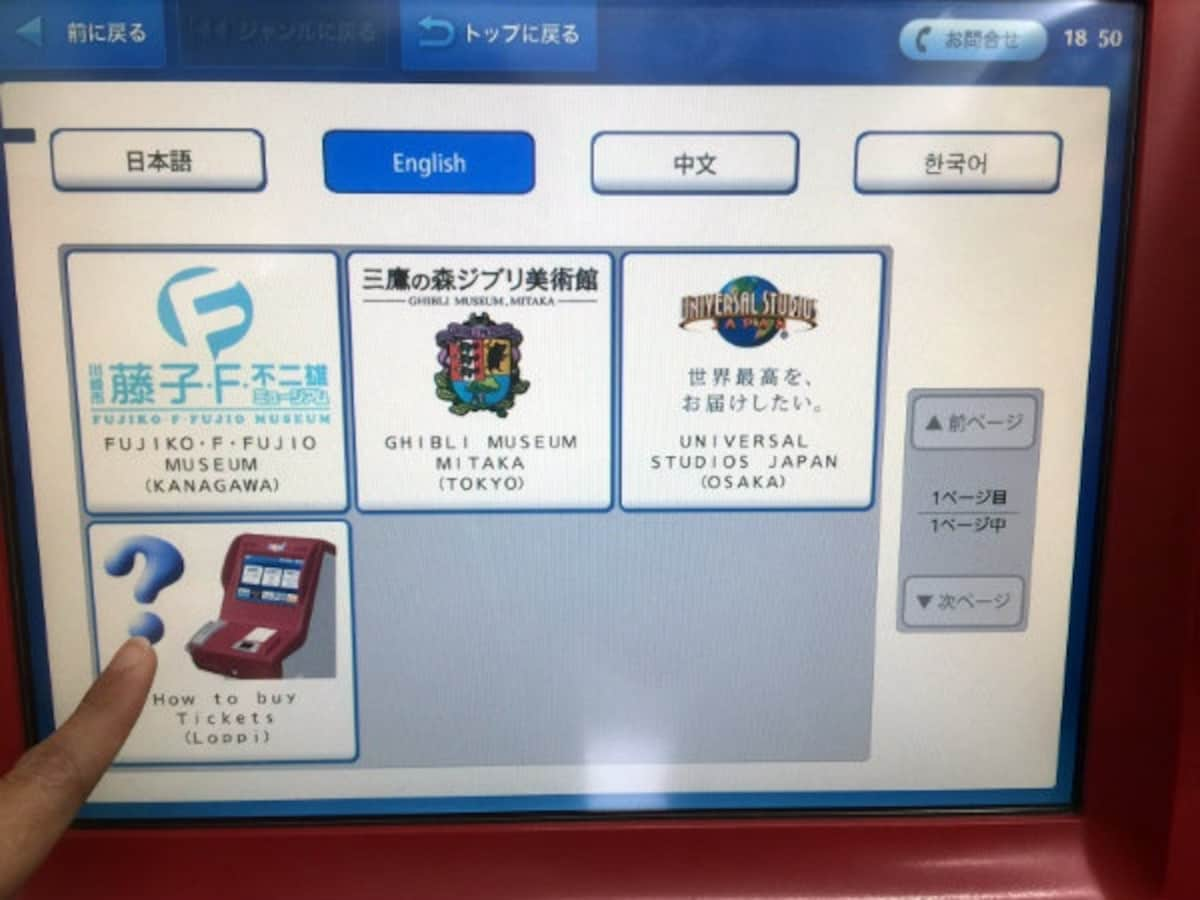
...to get quick access to tickets for the Fujiko F. Fujio Museum (the Doraemon museum, another Lawson exclusive), the Ghibli Museum and Universal Studios Japan in Osaka.
You can also hit the How to Buy Tickets button to get a basic explanation of how to use the machine. A detailed outline of how to buy the Fujiko F. Fujio Museum tickets can be found here, while USJ ticket purchases are explained here.
Regardless, it's essentially the same process. We'll use Disneyland tickets as an example for our walk-through.
Disneyland & Disney Sea
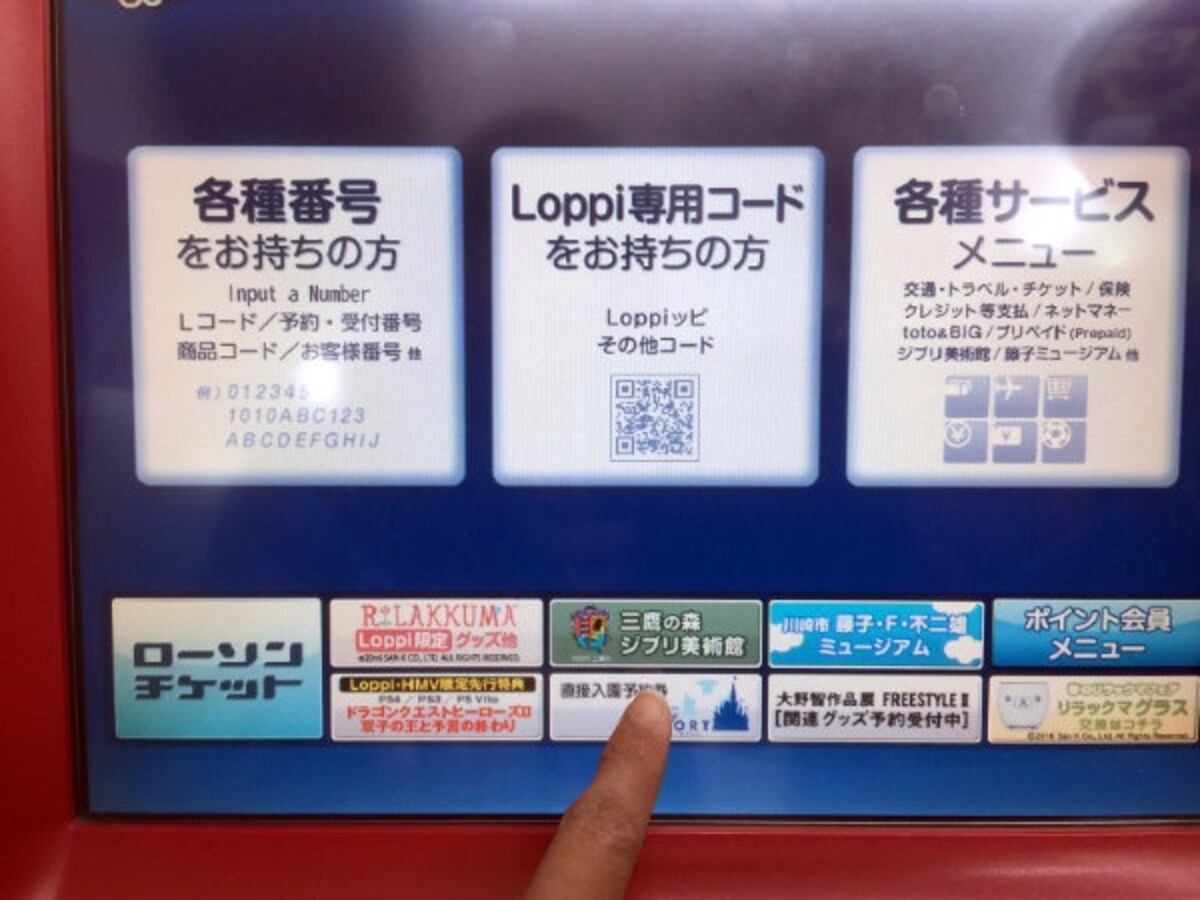
If you want Disney tickets, rather than hitting the More Information button, just hit the button in the bottom middle of the main screen.
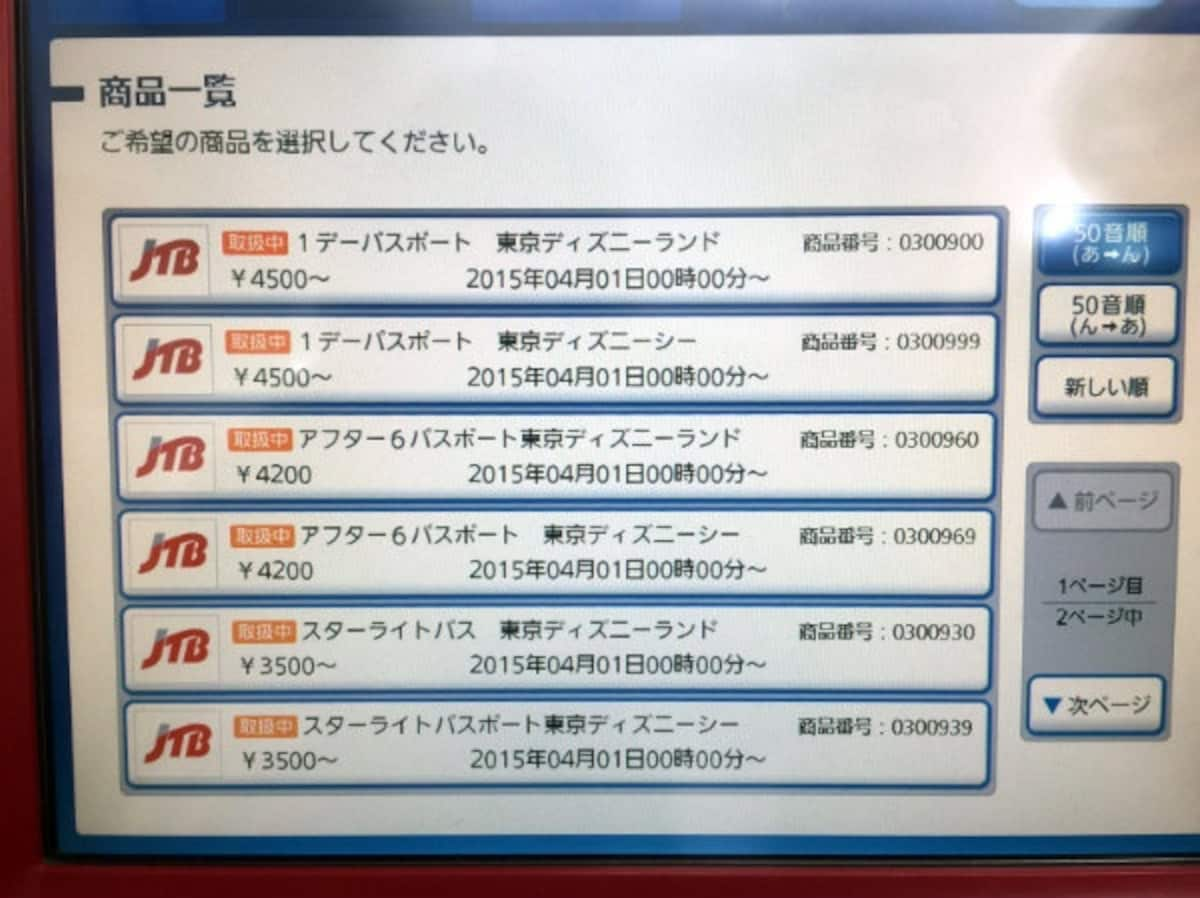
Don't panic at the list of Japanese. The options are:
• 1-Day Passport for Tokyo Disneyland (1デーパスポート 東京ディズニーランド)
• 1-Day Passport for Tokyo Disney Sea (1デーパスポート 東京ディズニーシー)
• After 6 Passport for Tokyo Disneyland (アフター6パスポート 東京ディズニーランド)
• After 6 Passport for Tokyo Disney Sea (アフター6パスポート 東京ディズニーシー)
• Starlight Passport for Tokyo Disneyland (スターライトパス 東京ディズニーランド)
• Starlight Passport for Tokyo Disney Sea (スターライトパス 東京ディズニーシー)
The bits in bold are the distinctions to look out for. ランド is "land" and シー is "sea." Since the tickets are not interchangeable, it's important to select the right theme park!
The after 6 Passport allows you to enter the park after 6 p.m. from Monday through Friday, with the exception of national holidays. The Starlight Passport grants entry to your park of choice from 3 p.m. on weekends and national holidays. You can find out more about Disney Resort ticket types here.
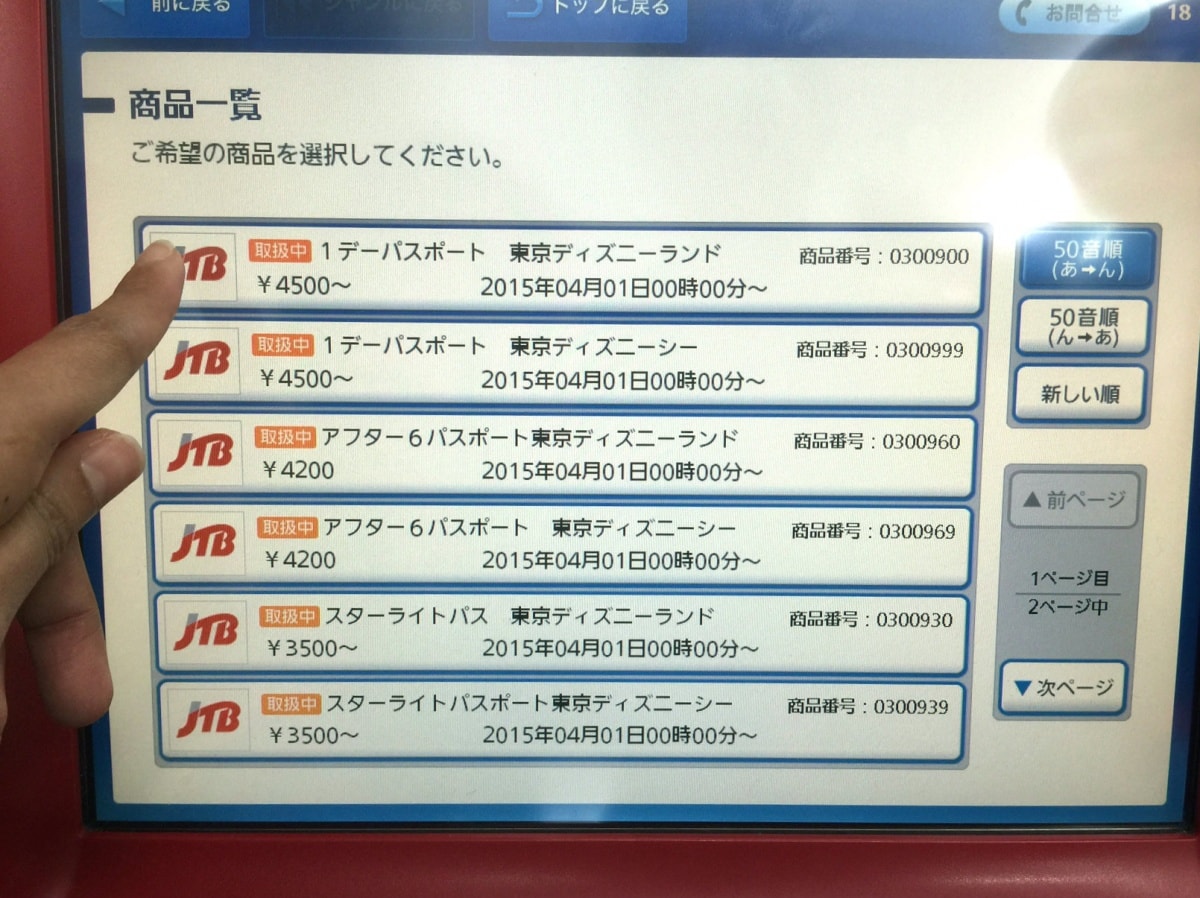
From here, select the option you want—in this case, a 1-Day Passport for Tokyo Disneyland.
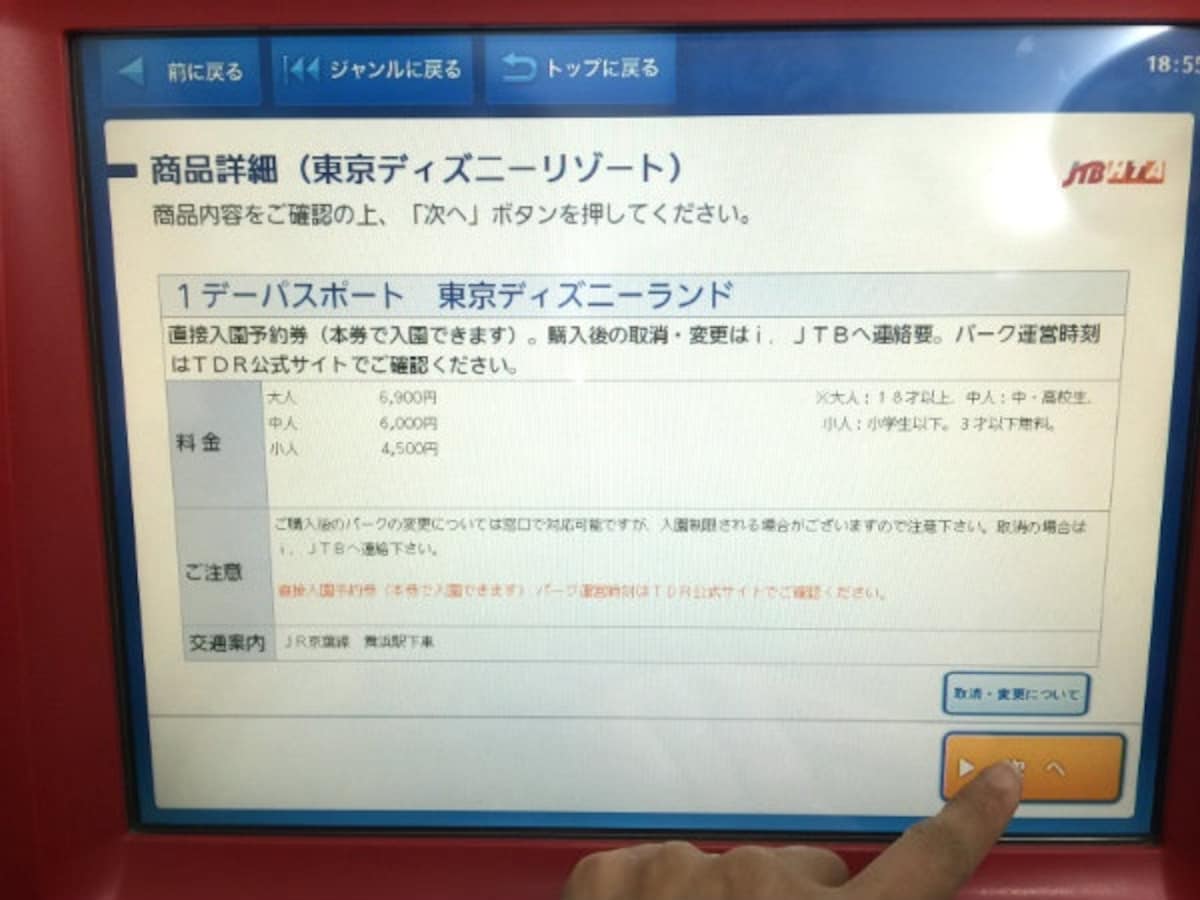
The next screen lists the prices for adults (大人), junior high and high school students (中人) and children between elementary school age and three years old (小). Children under 3 years of age are admitted free. Hit the yellow Next button (次へ) at the bottom right.
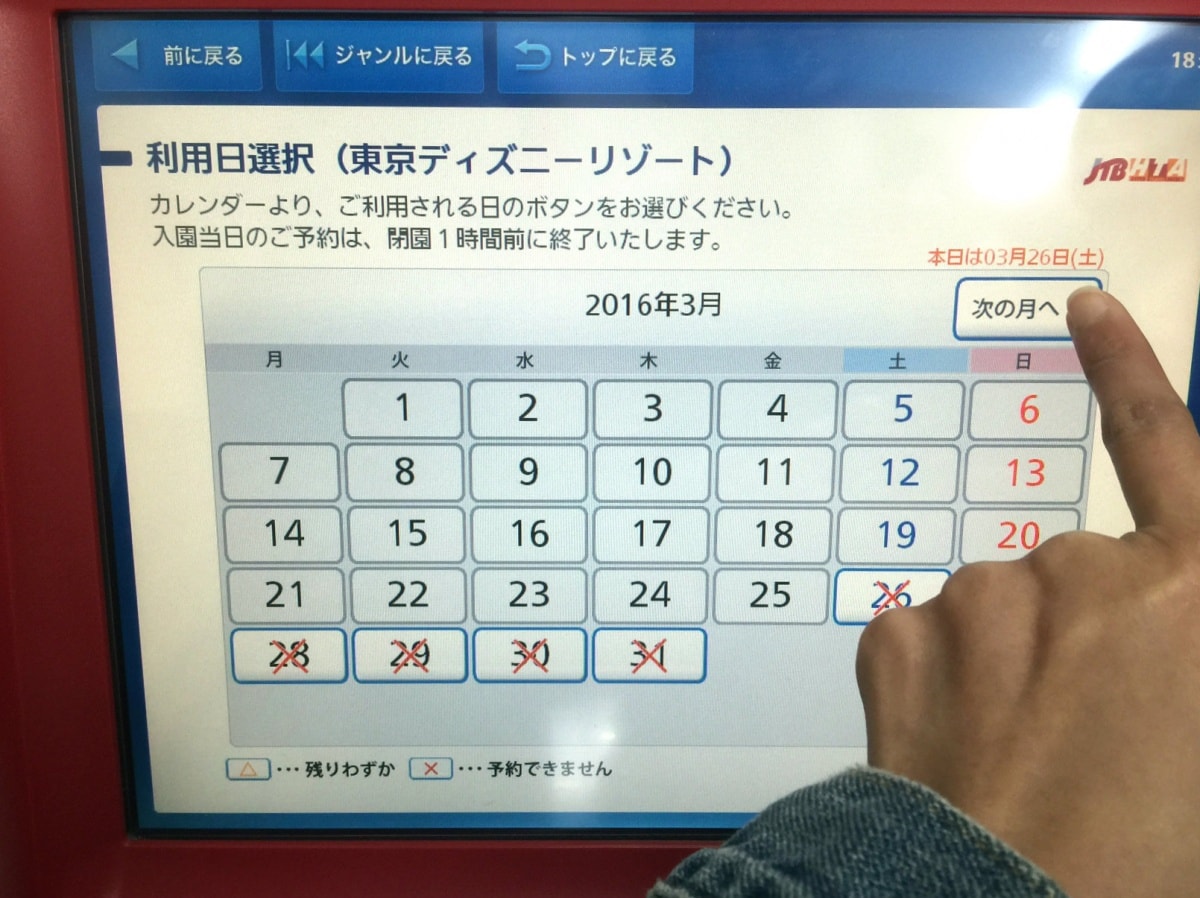
Next, select the date you want to attend the park. This is the calendar for March, indicated by 3月 (literally, "3 month") at the top center. Since we don't want March, we'll hit the Next Month button at the top right (次の月へ).
Note that some dates have already sold out! That's right—Tokyo Disneyland can sell out! All of these dates at the end of March are during the school spring break, so they're naturally hot dates for Disney!
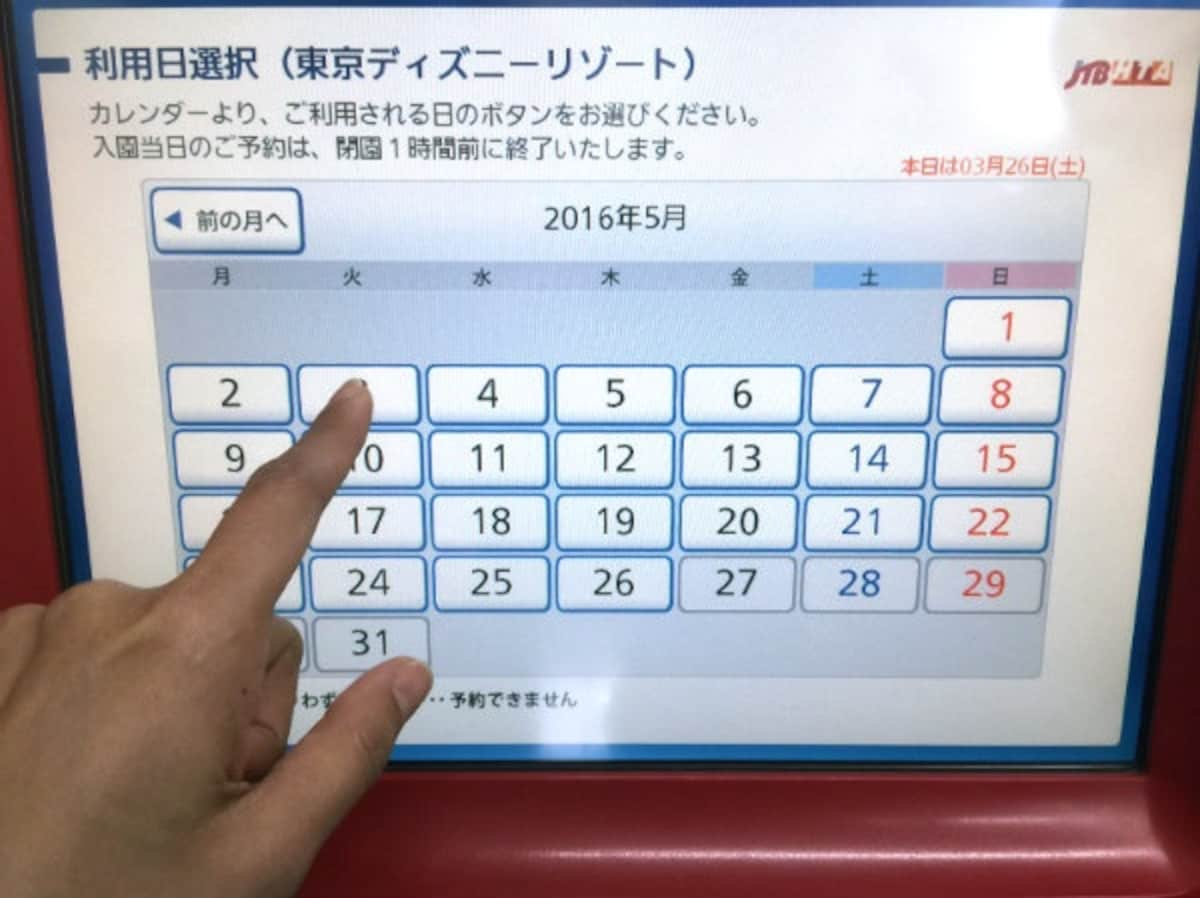
We've hit the Next Month button twice to get to May (5月, or 5 month). Now we hit the date we want: May 3.
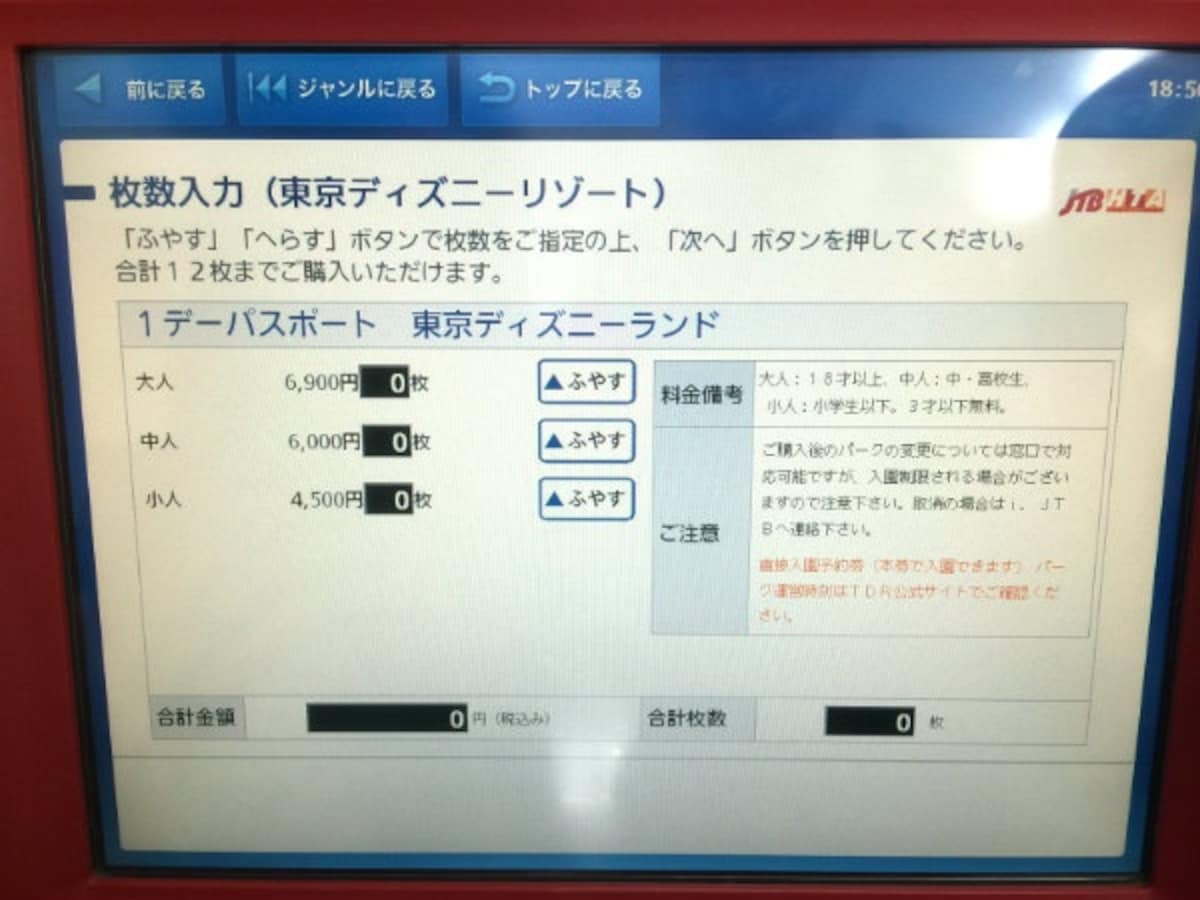
Here we select the number of passes we want for adults (大人), junior high and high school students (中人), and children (小人).

Hit the blue Up Arrows in the middle of the screen to increase the number of passes selected for each. If you make a mistake, just hit the Down Arrows to reduce the number.
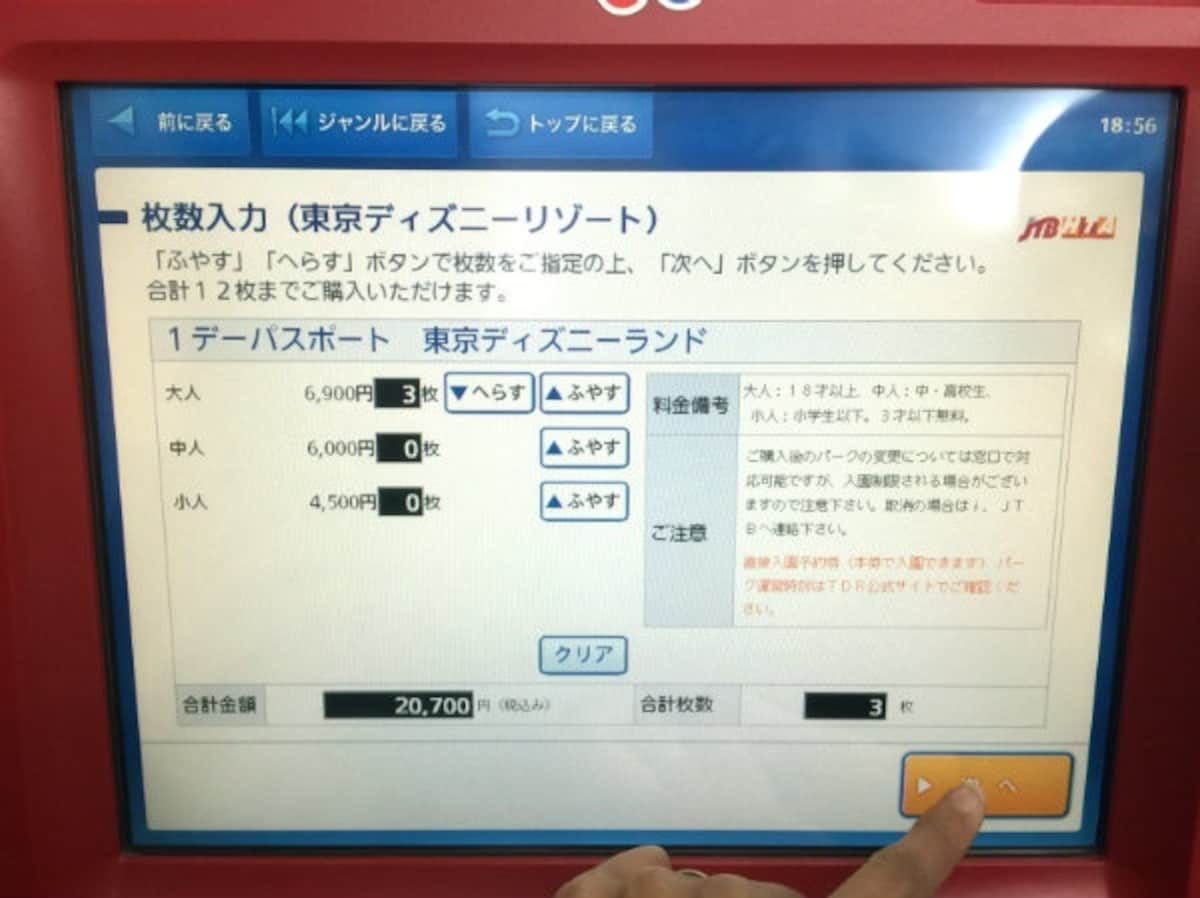
We've selected three adult tickets. You can see the total price and total number of tickets at the bottom of the screen. Hit the yellow Next button to proceed.
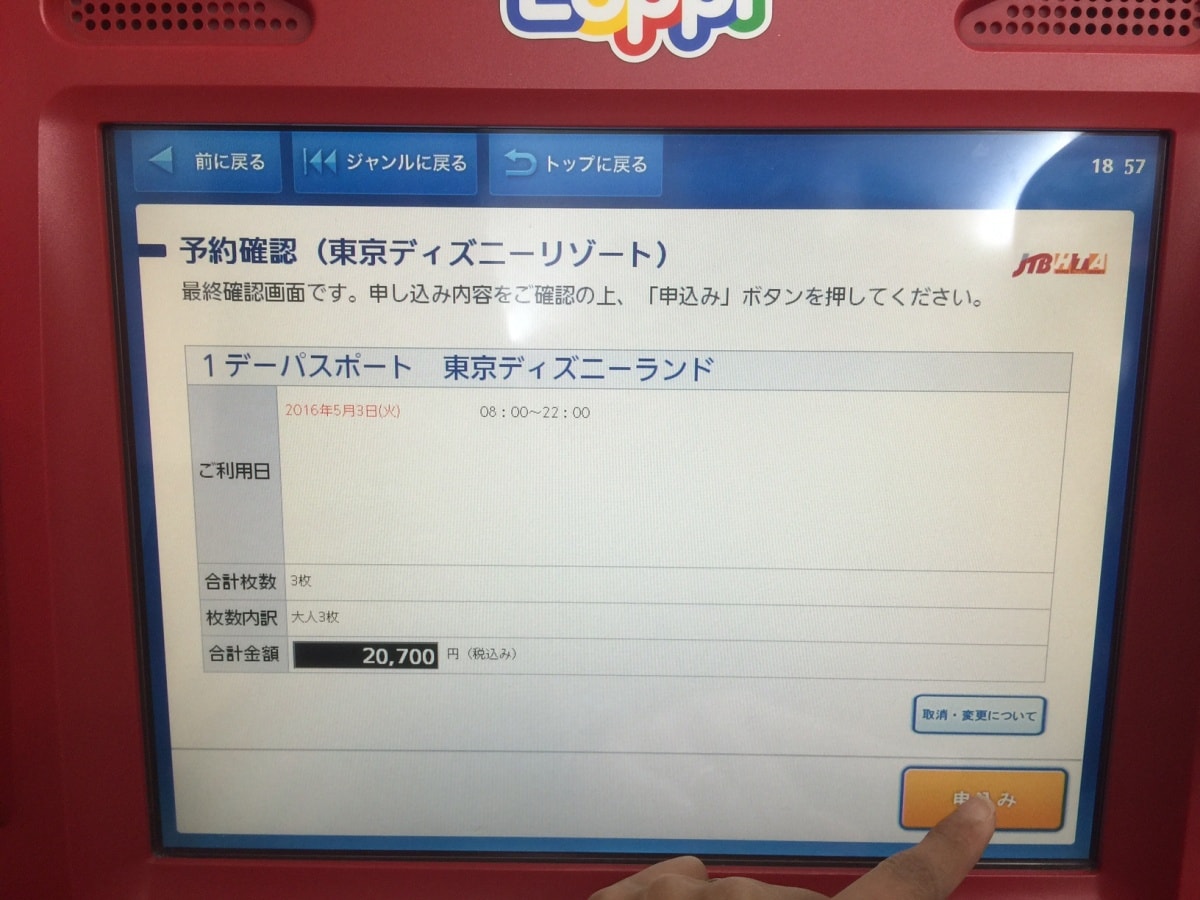
Double-check the final information. You can see the date in red at the top, and the hours for which the ticket is valid beside it.
If you're okay with the result, hit the yellow Apply button (申込み). If you want to go back one screen, hit the button at the top left of the screen (前に戻る). If you want to go to the beginning of the selection process, hit the middle button at the top. And the rightmost button at the top will take you back to the starting screen.
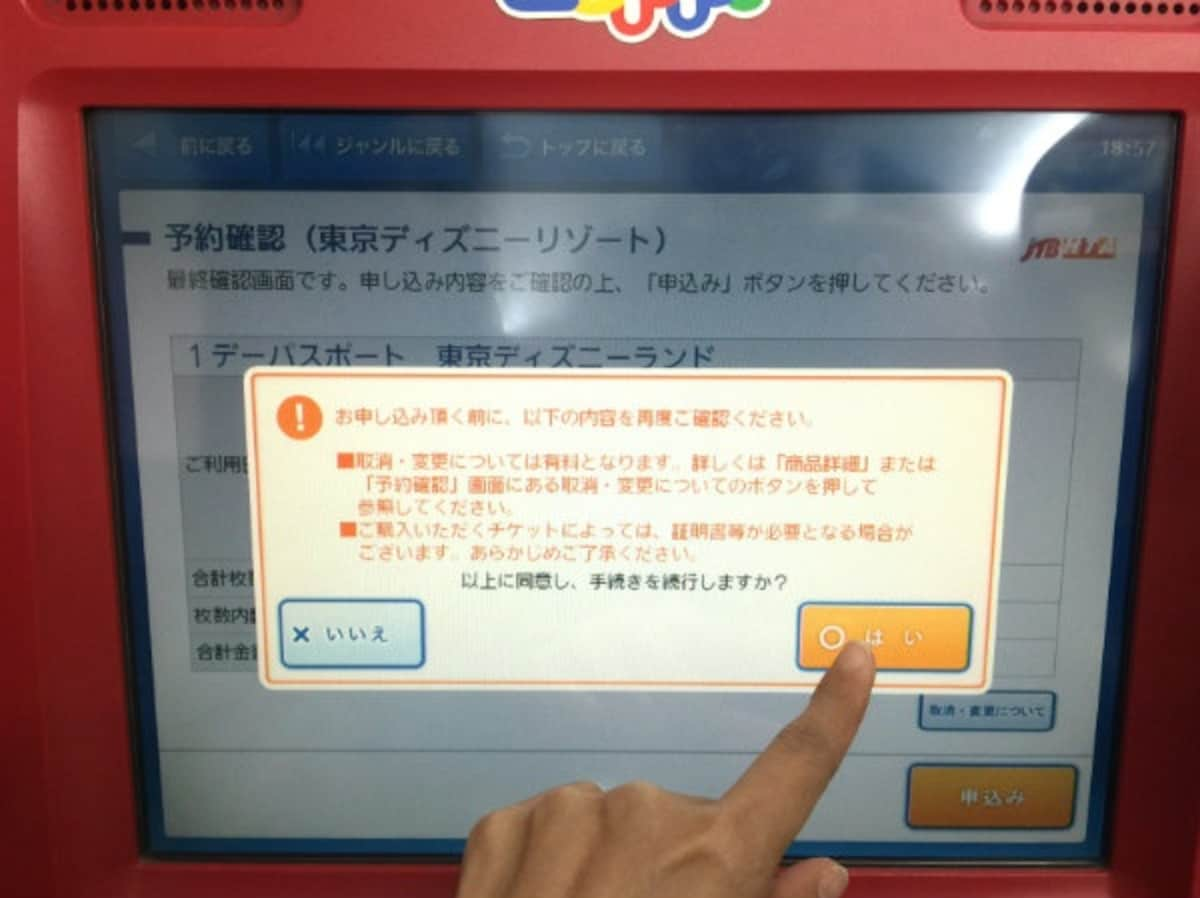
Before proceeding, you'll see this warning, which states that changes and cancellations from this point will incur a fee. It also notes that some tickets may require you to present ID. If that's fine, hit the yellow Yes button (O はい). If not, hit the blue No button (X いいえ).
Lawson seeks to realize its Corporate Philosophy of "Creating Happiness and Harmony in Our Communities" by operating neighborhood stores centered on its chainstore development and operation in Japan. Since opening its first store 40 years ago in June 1975, Lawson has evolved in response to changes in lifestyles and the social environment, resolving inconveniences that arise in its communities.
lawson.jp